Shark Navigator DLX Owners Manual: A Comprehensive Guide
Welcome! This detailed manual provides essential guidance for maximizing your Shark Navigator DLX’s performance. It covers setup, operation, maintenance, and troubleshooting, ensuring a consistently clean home.
Congratulations on selecting the Shark Navigator DLX Lift-Away vacuum! This powerful and versatile cleaning system is engineered to deliver a thorough clean on both carpets and hard floors, offering exceptional suction and innovative features. The Navigator DLX series, including models like the UV440, NV360, and NV361, is renowned for its Lift-Away technology, allowing for portable cleaning of stairs, upholstery, and other hard-to-reach areas.
This owner’s manual serves as your comprehensive guide to understanding and utilizing all the capabilities of your new vacuum. We’ll walk you through each component, explain the functions, and provide step-by-step instructions for optimal performance. Whether you’re a first-time Shark owner or a seasoned user, this manual will ensure you get the most out of your investment. Proper care and maintenance, as outlined within, will extend the life of your vacuum and maintain its cleaning efficiency.
Understanding Your Vacuum: Model Numbers & Series
The Shark Navigator DLX family encompasses several models, each offering slight variations in features and accessories. Common series include the UV440, NV360, and NV361, all falling under the “Deluxe” designation. Your specific model number, found on the vacuum’s underside or packaging, is crucial for identifying compatible parts and accessing tailored support resources.
While core functionality remains consistent across the DLX series – namely, the Lift-Away feature and powerful suction – differences may exist in included attachments or specific design elements. Knowing your model number allows you to accurately locate replacement filters, brushrolls, or nozzles when needed. Sharkclean.com provides detailed information and support based on your specific model. Referencing your model number when contacting customer service (1-800-798-7398) ensures efficient assistance. Understanding these distinctions helps maximize your vacuum’s performance and longevity.
What’s Included in the Box: Parts List
Upon unboxing your Shark Navigator DLX, ensure all components are present. Typically, you’ll find the main vacuum body, a Lift-Away pod, the wand, and a hose for extended reach. Floor nozzles are included – a standard brushroll for carpets and a bare floor nozzle for delicate surfaces.
Several attachments enhance versatility: a crevice tool for tight spaces, a dusting brush for furniture and upholstery, and potentially a pet power brush for removing embedded hair. Some models may include additional accessories like a flexible hose extension. Carefully review the included documentation to confirm the complete parts list specific to your model (UV440, NV360, or NV361). Retain the packaging and manual for warranty purposes and future reference. Missing parts? Contact Shark customer support immediately for assistance and replacements.

Setting Up Your Shark Navigator DLX
Get ready to clean! This section details the simple steps to assemble your vacuum, attach essential components, and select the optimal floor nozzle for effective cleaning.
Assembling the Vacuum: Step-by-Step Instructions
Initial Assembly: Begin by connecting the pod to the base. Ensure a secure click to confirm proper attachment. Next, insert the wand into the pod – again, listen for a distinct click. The wand provides extended reach for cleaning various areas.
Handle Installation: Attach the handle to the back of the pod. Tighten any screws (if applicable) to ensure stability during operation. A firmly secured handle is crucial for maneuverability and control.
Nozzle Connection: Select your desired floor nozzle (detailed in the next section) and firmly push it onto the wand or directly into the pod, depending on your cleaning needs. Verify a snug fit to prevent suction loss.
Important Note: Refer to the diagrams in your manual for visual guidance. Incorrect assembly can impact performance. Always double-check connections before powering on the vacuum.
Attaching the Wand and Hose
Wand Connection: The Shark Navigator DLX wand easily connects to the pod for extended reach. Align the wand with the designated port and firmly push until you hear a click, ensuring a secure attachment. This allows cleaning of ceilings, curtains, and under furniture.
Hose Attachment: For versatile cleaning, connect the hose to the pod’s hose inlet. A twisting motion often secures the hose in place. The hose is ideal for accessing tight spaces and cleaning upholstery.
Combined Use: You can attach tools directly to the wand or the hose, depending on the cleaning task. Experiment to find the most comfortable and effective configuration.
Detaching: To detach, locate the release button (typically red) and press while gently pulling the wand or hose away from the pod. Avoid forceful removal to prevent damage.
Choosing the Right Floor Nozzle

Standard Floor Nozzle: The Shark Navigator DLX typically includes a standard floor nozzle designed for both carpets and hard floors. It features a switch to toggle between these surfaces, optimizing suction and brushroll action.
Hard Floor Hero: For predominantly hard floor cleaning, consider the “Hard Floor Hero” attachment (sold separately). This nozzle minimizes scratching and maximizes dust pickup on surfaces like wood, tile, and laminate.
Carpet Deep Cleaner: For heavily soiled carpets, a specialized carpet nozzle with enhanced brushroll agitation can be beneficial. This helps lift embedded dirt and debris.
Nozzle Selection: Always ensure the nozzle is securely attached to the wand or hose before operation. Incorrect nozzle selection can reduce cleaning effectiveness and potentially damage your floors. Refer to the included diagrams for proper attachment.

Operating Your Shark Navigator DLX
Get Started! Powering on your Shark Navigator DLX is simple. Adjust suction levels for optimal cleaning, and utilize the Lift-Away feature for versatile reach.
Powering On and Off
Initiating Operation: To power on your Shark Navigator DLX, locate the power button, typically situated on the main body of the vacuum. A single press will activate the motor, initiating the cleaning process. The power button often illuminates to indicate the vacuum is running.
Power Settings: Some models feature multiple power settings, allowing you to adjust the suction strength based on the surface you are cleaning. Lower settings are ideal for delicate surfaces like rugs or curtains, while higher settings are best for carpets and hard floors with embedded dirt.
Shutting Down: To turn off the vacuum, simply press the power button again. Ensure the vacuum has completely stopped before disconnecting it from the power outlet or storing it. Avoid abruptly pulling the power cord, as this could damage the appliance. A complete power cycle ensures longevity and safety;
Automatic Shut-Off: Certain Shark Navigator DLX models may include an automatic shut-off feature to prevent overheating. If this occurs, allow the vacuum to cool down before attempting to restart it.
Adjusting Suction Control
Optimizing Cleaning Performance: Your Shark Navigator DLX features adjustable suction control, crucial for effectively cleaning diverse surfaces. Locate the suction release collar, usually positioned on the handle or the vacuum body. Rotating this collar allows you to modify the airflow.

Surface-Specific Settings: For delicate surfaces like drapes or upholstery, reduce suction by opening the collar. This prevents damage and ensures gentle cleaning. Conversely, maximize suction by closing the collar when tackling carpets or hard floors with stubborn debris.
Identifying Optimal Levels: Observe the vacuum’s performance. If it’s difficult to push on carpets, reduce suction. If debris isn’t being effectively collected, increase it. Experiment to find the ideal setting for each cleaning task.
Lift-Away Mode & Suction: When utilizing the Lift-Away feature, suction levels may automatically adjust. Refer to the Lift-Away section for specific guidance. Proper suction control extends filter life and enhances overall cleaning efficiency.
Using the Lift-Away Feature
Enhanced Versatility: The Lift-Away feature transforms your Shark Navigator DLX into a portable handheld vacuum, perfect for cleaning above-floor areas and reaching tight spaces. To activate, press the Lift-Away release button, typically located on the body of the vacuum.
Detaching the Pod: Gently lift the pod away from the base. Ensure the dust cup is securely attached to the pod during this process to prevent spills. The wand and hose can then be connected directly to the pod for extended reach.
Cleaning Applications: Utilize Lift-Away mode for cleaning stairs, upholstery, car interiors, and other areas where maneuverability is key. Attach appropriate accessories like the crevice tool or dusting brush for targeted cleaning.
Reattaching the Pod: To return to upright mode, align the pod with the base and firmly press down until it clicks into place. Verify secure attachment before resuming floor cleaning.

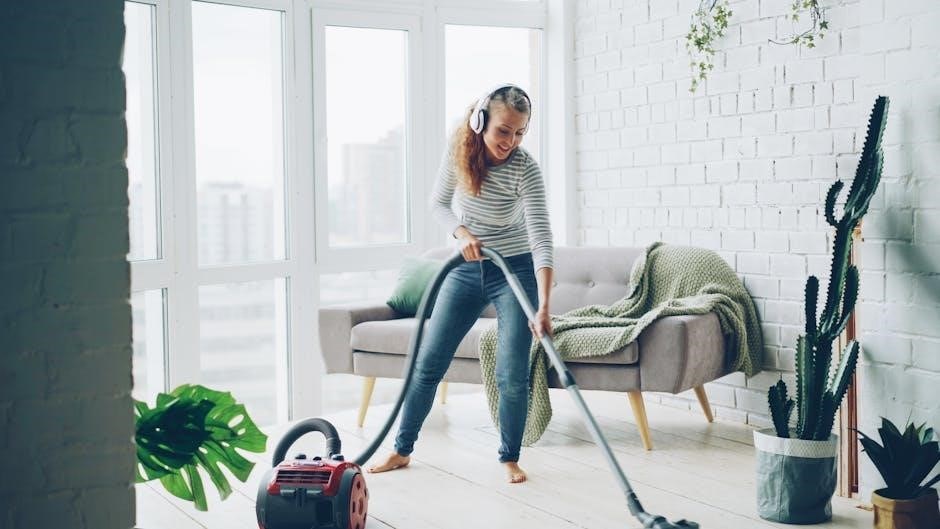
Cleaning with Your Shark Navigator DLX
Effective Cleaning: Discover optimal techniques for carpets, hard floors, and above-floor surfaces. Utilize specialized tools and suction settings for a thorough, efficient clean.
Carpet Cleaning Techniques
Deep Carpet Cleaning: For optimal results on carpets, begin by selecting the appropriate floor nozzle – typically the carpet nozzle with the brushroll engaged. Adjust the suction control to the highest setting for deep-pile carpets or lower for delicate rugs.
Forward and Backward Strokes: Employ slow, deliberate forward and backward strokes, overlapping each pass slightly to ensure comprehensive coverage. Avoid rushing, allowing the brushroll to agitate and lift embedded dirt and debris.
Spot Cleaning: For localized stains, utilize the hose and crevice tool for targeted cleaning. Pre-treating stubborn stains with a carpet cleaner can enhance effectiveness. Always test the cleaner in an inconspicuous area first.
Lift-Away Mode: Consider using the Lift-Away feature for cleaning stairs or reaching under furniture. This provides enhanced maneuverability and focused suction. Regularly check and empty the dust cup during extended carpet cleaning sessions to maintain optimal performance.
Hard Floor Cleaning Techniques
Selecting the Hard Floor Nozzle: To effectively clean hard floors – such as hardwood, tile, or laminate – switch to the dedicated hard floor nozzle. This nozzle is designed with soft bristles to polish and protect delicate surfaces, preventing scratches.
Suction Control Adjustment: Reduce the suction power to a lower setting when cleaning hard floors. Excessive suction can cause the vacuum to stick or potentially damage sensitive flooring. Experiment to find the ideal balance.
Wet Debris Considerations: The Shark Navigator DLX can handle some wet debris, but avoid excessive liquid. For significant spills, pre-clean with a mop or towel before vacuuming.
Polishing Action: The gentle buffing action of the hard floor nozzle helps to restore shine and remove light scuffs. Regularly inspect the nozzle for debris buildup and clean as needed to maintain optimal performance. Utilize the Lift-Away feature for under-furniture access.
Above-Floor Cleaning: Crevice Tool & Dusting Brush
Crevice Tool Utilization: The crevice tool excels at reaching tight spaces – including corners, along baseboards, and between furniture cushions. Apply firm, steady pressure for optimal debris removal from narrow openings.
Dusting Brush Applications: Employ the dusting brush for delicate surfaces like lampshades, bookshelves, and window sills. Its soft bristles gently lift dust without causing scratches or damage.
Wand Extension: Utilize the wand extension to increase your reach for cleaning ceilings, curtains, and high-up surfaces. Ensure a secure connection to prevent accidental detachment during use.
Lift-Away Convenience: The Lift-Away feature significantly enhances above-floor cleaning versatility. Detach the canister for lightweight maneuverability and access to challenging areas. Combine tools for specialized cleaning tasks, maximizing the Navigator DLX’s capabilities.
Maintenance and Troubleshooting
Regular upkeep ensures peak performance. This section details dust cup emptying, filter cleaning, brushroll maintenance, and solutions for common issues like suction loss.
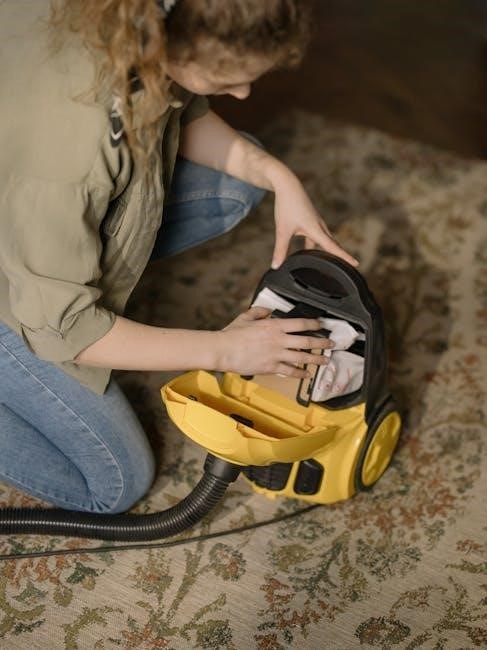
Emptying the Dust Cup
Maintaining optimal suction relies heavily on regularly emptying the dust cup of your Shark Navigator DLX. A full dust cup significantly reduces cleaning performance. To empty, detach the dust cup from the vacuum body by pressing the release button – typically located on the underside.
Hold the dust cup over a trash receptacle and press the bottom release latch to open the cup and dispose of the collected debris. Ensure all dust and particles are removed. For stubborn debris, gently tap the dust cup to dislodge it.
Important: After emptying, reattach the dust cup securely to the vacuum. Verify it clicks into place to ensure a proper seal. Avoid washing the dust cup in a dishwasher, as this may damage the plastic. Wipe it clean with a damp cloth if necessary. Frequent emptying, ideally after each use or when debris reaches the “Max” fill line, will prolong your vacuum’s life and maintain its cleaning efficiency.
Cleaning the Filters: Types & Frequency
Your Shark Navigator DLX utilizes multiple filters crucial for trapping dust and allergens. These filters require regular cleaning to maintain suction power and air quality. The primary filters include the pre-motor foam filter and the post-motor HEPA filter.
The pre-motor foam filter should be hand-washed monthly. Rinse thoroughly under cool water until the water runs clear, then allow it to air dry completely – approximately 24 hours – before reinstalling. Do not use soap. The post-motor HEPA filter should be cleaned every three months. Tap it gently to remove loose dust, and then rinse under cool water.
Crucially, ensure both filters are completely dry before reassembly to prevent damage to the motor. Replacing filters annually, or more frequently with heavy use, is recommended for optimal performance. A clean filter system ensures efficient cleaning and extends the lifespan of your vacuum.
Brushroll Maintenance: Removing Hair & Debris
Maintaining your Shark Navigator DLX’s brushroll is vital for effective carpet cleaning. Hair, string, and debris frequently wrap around the brushroll, reducing its efficiency and potentially causing damage. Regularly inspect the brushroll – ideally after each use – for accumulated materials.
To remove tangled debris, first ensure the vacuum is turned off and unplugged. Use the provided brushroll tool, or a pair of scissors, to carefully cut and remove hair and string. Avoid pulling forcefully, as this could damage the bristles. For stubborn debris, you may need to remove the brushroll entirely (refer to the assembly instructions).
Periodically, check for any obstructions within the brushroll housing. A clear brushroll and housing ensure optimal suction and cleaning performance. Consistent brushroll maintenance extends the life of your vacuum and keeps your carpets looking their best.
Troubleshooting Common Issues: Loss of Suction, Overheating
Experiencing reduced suction or overheating with your Shark Navigator DLX? Several factors could be at play. First, check the dust cup – a full cup significantly diminishes suction power. Ensure it’s emptied and properly reattached. Next, inspect the filters; clogged filters restrict airflow, leading to suction loss and potential overheating.
If suction remains weak after addressing the dust cup and filters, examine the hose and wand for blockages. Disconnect and clear any obstructions. Overheating often indicates restricted airflow, so revisit filter and hose checks; Avoid using the vacuum on excessively wet surfaces, as this can also cause overheating.
If the issue persists, consult the full owner’s manual or Shark’s customer support for further assistance. Ignoring these issues can lead to permanent damage to your vacuum cleaner.
Replacing Parts: Where to Find Compatible Accessories
Maintaining your Shark Navigator DLX often requires replacing worn or damaged parts. Fortunately, finding compatible accessories is straightforward. Shark’s official website (sharkclean.com) is the primary source for genuine replacement parts, including filters, brushrolls, and hoses. You can search by model number (UV440 for the DLX) to ensure compatibility.
Alternatively, numerous online retailers, such as Amazon, Walmart, and eBay, stock Shark Navigator DLX accessories. However, always verify the seller’s reputation and confirm the part number matches your vacuum’s specifications to avoid purchasing incompatible items. Beware of generic or third-party parts, as their quality may vary.
For specific guidance, refer to your owner’s manual’s parts list. Regular replacement of filters and brushrolls optimizes performance and extends the lifespan of your Shark Navigator DLX.

Safety Precautions and Warranty Information
Prioritize safety when operating your Shark Navigator DLX. Always disconnect the vacuum from the power outlet before performing any maintenance or troubleshooting. Never operate the vacuum with a damaged cord or plug. Avoid using outdoors or on wet surfaces to prevent electric shock.
Keep the vacuum away from children and pets during operation. Do not vacuum flammable liquids or combustible materials. Ensure proper ventilation when vacuuming dusty areas. Shark offers a limited warranty covering defects in materials and workmanship.
The warranty period typically ranges from one to five years, depending on the specific component. Retain your proof of purchase for warranty claims. Refer to the warranty documentation included with your vacuum or visit sharkclean.com for complete details and registration information; Following these precautions ensures safe and reliable operation.