
Navigating the world of saxophone mouthpieces is crucial for tone and playability. This guide explores types, materials, sizes, and brands, aiding your selection process.
The saxophone mouthpiece is arguably the most impactful component influencing a player’s sound and experience. Beyond the instrument itself, the mouthpiece dramatically shapes tone color, projection, and responsiveness. Beginners often start with a standard model, like Yamaha’s 4C, paired with a size 2 reed, focusing on fundamental embouchure development.
However, the “right” mouthpiece is deeply personal. Exploring different options unlocks a vast spectrum of sonic possibilities. Understanding mouthpiece anatomy – tip opening, facing, baffle, and chamber – is key to informed decision-making. This guide will demystify these elements, providing a foundation for selecting a mouthpiece that complements your playing style and musical goals, ultimately enhancing your saxophone journey.
Why Your Mouthpiece Matters
A saxophone mouthpiece isn’t merely a connector; it’s the primary driver of your instrument’s voice. It significantly impacts tone quality – from bright and edgy to warm and mellow – and influences projection, allowing for subtle nuance or powerful resonance. Metal mouthpieces, for instance, generally offer increased power compared to hard rubber or plastic.
Furthermore, the mouthpiece affects playability. Tip opening dictates ease of producing notes and influences the required embouchure control. Choosing the correct mouthpiece can resolve issues with intonation, response, and overall comfort. Experimentation is vital; a well-matched mouthpiece unlocks your saxophone’s full potential, fostering musical expression and enjoyment.
Types of Saxophone Mouthpieces
Saxophone mouthpieces broadly fall into three categories: hard rubber, metal, and plastic. Hard rubber mouthpieces are renowned for their adaptable, wide-spreading sound, suitable for diverse musical settings. Metal mouthpieces deliver enhanced power and projection, favored by players needing to cut through ensembles.
Plastic mouthpieces, often the most affordable, are popular among beginners due to their durability and ease of play. However, they generally offer less tonal complexity than their counterparts. Each type presents unique characteristics, influencing tone, response, and overall playing experience. Selecting the appropriate type depends on individual preferences, musical style, and desired sonic qualities.
Hard Rubber Mouthpieces
Hard rubber mouthpieces are a classic choice, celebrated for their warm, rich tone and versatility. They offer a broad, adaptable sound that performs well across various musical genres, from classical to jazz. These mouthpieces generally provide a comfortable playing experience, making them suitable for players of all levels.
The material’s density contributes to a complex harmonic structure, enhancing tonal depth. While not as bright or projecting as metal, hard rubber offers a balanced response and is often preferred for its nuanced sound. They remain a popular option due to their consistent performance and affordability.
Metal Mouthpieces
Metal saxophone mouthpieces are renowned for their powerful projection and bright, focused tone. Offering increased volume and clarity, they are a favorite among players needing to cut through ensembles or seeking a more assertive sound. Typically crafted from brass, these mouthpieces deliver a distinct edge and responsiveness.
Compared to hard rubber or plastic, metal mouthpieces exhibit a quicker response and greater dynamic range. Metal mouthpieces offer more power and projection, making them ideal for genres like rock, funk, and high-energy jazz. However, they can require a more developed embouchure to control effectively.
Plastic Mouthpieces
Plastic saxophone mouthpieces represent an economical and accessible entry point for beginners. Often included with student instruments, they provide a serviceable sound and are durable enough to withstand the rigors of learning. While not offering the tonal complexity of hard rubber or metal, plastic mouthpieces are perfectly adequate for foundational practice.
These mouthpieces generally produce a warmer, softer tone compared to metal counterparts. They are relatively easy to play, requiring less embouchure control, which is beneficial for developing players. However, plastic mouthpieces typically lack the projection and responsiveness desired by more advanced saxophonists.
Mouthpiece Materials: A Detailed Look
The material of a saxophone mouthpiece profoundly impacts its sound, response, and overall playing experience. Three primary materials dominate the market: hard rubber, metal, and plastic, each possessing unique characteristics. Understanding these differences is vital for informed selection.
Hard rubber offers a warm, complex tone with excellent resonance, favored by many jazz and classical players. Metal mouthpieces deliver a brighter, more powerful sound with increased projection, often preferred for louder genres. Plastic, the most affordable option, provides a simpler tone suitable for beginners.
Each material interacts differently with vibrations, influencing tonal color and dynamic range.
Hard Rubber – Characteristics & Sound
Hard rubber mouthpieces are renowned for their warm, rich tonal qualities and adaptability. They typically exhibit a wider-spreading sound, making them versatile across various musical styles. This material offers a comfortable playing experience, often favored by both beginners and seasoned professionals.
The density of hard rubber contributes to excellent resonance and complex overtones, providing a nuanced sound. Players appreciate its responsiveness and ability to produce a full, rounded tone. Hard rubber is also known for its forgiving nature, making it easier to control embouchure and intonation.
These mouthpieces are a classic choice for a reason!
Metal – Characteristics & Sound
Metal saxophone mouthpieces are distinguished by their bright, powerful, and projecting sound. They offer increased volume and clarity, making them ideal for louder musical settings and cutting through ensembles. The material’s inherent properties contribute to a focused tone with enhanced harmonic content.
Compared to hard rubber or plastic, metal mouthpieces generally require a more developed embouchure to control their responsiveness and prevent harshness. Players often describe the sound as having more edge and brilliance. Metal mouthpieces offer more power and projection than other materials.
They are a favorite among lead players!
Plastic – Characteristics & Sound
Plastic saxophone mouthpieces are often the most affordable option, making them popular with beginners. While generally not favored by professionals for critical performance, they offer a reasonable starting point for developing embouchure and tone. The sound produced tends to be brighter and less complex than hard rubber or metal.
Plastic mouthpieces are known for their durability and resistance to wear and tear. However, they may not offer the same level of tonal nuance or responsiveness as higher-end materials. They are a lightweight option, which can be comfortable for some players.
They are a good choice for students!
Understanding Mouthpiece Anatomy
A saxophone mouthpiece isn’t just a single piece; it’s a carefully engineered component with distinct parts influencing sound and playability. The tip opening, the space between the reed and mouthpiece, dramatically affects resistance and tonal color – wider openings are easier to blow but require more control.
The facing, or curve of the mouthpiece, impacts reed response. Rails guide the reed’s vibration, while the baffle, a step inside the mouthpiece, shapes the tone. Finally, the chamber, the internal space, influences projection and resonance.
Understanding these elements is key to informed selection!
Tip Opening
The tip opening is arguably the most significant anatomical feature of a saxophone mouthpiece, defining the space between the reed and the mouthpiece’s tip. Measured in hundredths of an inch, it directly impacts resistance and tonal characteristics.
Smaller tip openings (e.g., .065”) are easier to control, ideal for beginners and producing a focused sound. Larger openings (e.g., .110”) offer greater dynamic range and a brighter tone, but demand more air support and embouchure control.
Theo Wanne emphasizes that tip opening affects playability, varying between modern and vintage brands. Careful consideration is vital for matching your skill level and desired sound.
Facing
The facing of a saxophone mouthpiece refers to the angle and curvature of the tip where the reed makes contact. It’s a critical element influencing response, ease of play, and tonal color. A well-designed facing ensures a consistent seal with the reed, minimizing air leakage and maximizing vibration.
Facing length and curve vary between manufacturers and models. Longer facings generally offer more control and a darker tone, while shorter facings provide quicker response and brighter projection.
Yamaha recommends beginners start with a standard mouthpiece (like the 4C) to establish proper embouchure, which is heavily influenced by the facing’s characteristics.
Rails
The rails of a saxophone mouthpiece are the side walls of the tip, guiding the reed and influencing its vibration. Their shape and thickness significantly impact the mouthpiece’s response and tonal characteristics. Wider rails generally provide more stability and control, particularly beneficial for players seeking a focused sound.
Narrower rails offer increased flexibility and a brighter, more open tone. Theo Wanne emphasizes how tip openings, alongside rail design, affect playability across different saxophone types.
Consistent rail symmetry is vital for even reed contact and optimal performance. Variations can lead to uneven response and intonation issues.
Baffle
The baffle is the stepped area within the mouthpiece that sits directly under the tip rail of the reed. It plays a critical role in shaping the sound by influencing the airflow and resonance within the mouthpiece chamber.
A higher baffle generally produces a brighter, more projecting sound with increased harmonic complexity, favored by players needing volume and cut-through. Conversely, a lower baffle yields a darker, warmer tone with a more mellow character.
Vandoren mouthpieces demonstrate varied baffle designs impacting tonal qualities. The baffle’s shape – rounded, stepped, or sloped – further refines the sonic outcome.
Chamber
The chamber, the internal cavity of the mouthpiece, significantly impacts the saxophone’s overall tone and resonance. Its size and shape influence the harmonic development and projection of the sound.
Larger chambers generally create a warmer, darker, and more spacious sound, often preferred for jazz and ballad playing. Smaller chambers tend to produce a brighter, more focused tone with quicker response, suitable for classical or rock styles.
Theo Wanne mouthpieces are known for their meticulously designed chambers, contributing to their distinct tonal characteristics. Vandoren also offers diverse chamber volumes, allowing players to tailor their sound.
Mouthpiece Sizes & Tip Openings
Mouthpiece sizes and tip openings are critical factors influencing playability and tonal characteristics. Tip opening, measured in hundredths of an inch, refers to the gap between the reed and the mouthpiece tip.
Smaller tip openings (e.g., .65mm) are easier to control, ideal for beginners, producing a focused sound. Larger openings (e.g., .85mm+) offer greater resonance and projection, favored by advanced players for complex techniques.
Theo Wanne provides detailed tip size charts for various saxophones. Vandoren’s comparison charts help navigate options. Selecting the right size impacts embouchure requirements and overall responsiveness.
Choosing a Mouthpiece for Your Saxophone Type
Selecting a mouthpiece tailored to your saxophone is paramount for optimal performance. Each saxophone type – alto, tenor, soprano, and baritone – benefits from specific mouthpiece characteristics.
Alto saxophones often pair well with mouthpieces offering versatility. Tenor saxophones frequently utilize mouthpieces designed for projection and warmth. Soprano saxophones benefit from mouthpieces that enhance clarity and focus.

Baritone saxophones typically require mouthpieces capable of handling a lower register with power. Vandoren offers a wide range across all types, while comparison charts aid in finding the ideal fit. Consider your playing style and desired tone.

Alto Saxophone Mouthpieces
Alto saxophone mouthpieces prioritize versatility and responsiveness, catering to diverse musical styles. Beginners often start with a Yamaha 4C, fostering proper embouchure development. As players advance, options expand to include Vandoren’s AL3 or AL4, known for their balanced tone.
For brighter sounds, consider a mouthpiece with a higher tip opening. For a warmer tone, explore options with a smaller opening. Theo Wanne offers alto mouthpieces designed for projection and clarity. Comparison charts are invaluable for navigating the numerous choices, considering factors like baffle shape and chamber volume.
Tenor Saxophone Mouthpieces
Tenor saxophone mouthpieces significantly impact the instrument’s characteristic sound, ranging from smooth jazz tones to powerful rock and roll. Many beginners benefit from a Yamaha 4C, providing a solid foundation for embouchure control. Intermediate players often explore Vandoren mouthpieces like the Java or V5, offering increased projection and tonal complexity.
Metal tenor mouthpieces, as noted, deliver more power, ideal for cutting through ensembles. Hard rubber options provide a warmer, more focused sound. Theo Wanne’s tenor mouthpieces are highly regarded for their innovative designs and responsiveness. Careful consideration of tip opening and facing is crucial for optimal playability.
Soprano Saxophone Mouthpieces
Soprano saxophone mouthpieces present unique challenges due to the instrument’s conical bore and often, intonation quirks. Players frequently seek mouthpieces that enhance control and stability. Vandoren offers a range of soprano options, with comparisons readily available in their mouthpiece charts, aiding selection. A standard starting point often involves a moderate tip opening for ease of play.
Hard rubber choices generally provide a warmer tone, while metal mouthpieces can offer increased projection and brightness. Theo Wanne also provides specialized soprano mouthpieces designed for improved response. Careful attention to facing and baffle design is vital for achieving a consistent and pleasing sound on this instrument.
Baritone Saxophone Mouthpieces
Baritone saxophone mouthpieces demand robust construction and designs capable of handling the instrument’s low register and substantial air requirements. Players often prioritize projection and a full, resonant tone; Vandoren’s comparison charts are invaluable for navigating the available options, showcasing models suited for diverse playing styles.
Metal mouthpieces are particularly popular for baritone, offering power and clarity, while hard rubber provides a warmer, more complex sound. Theo Wanne specializes in baritone mouthpieces, focusing on improved response and intonation. Tip openings are generally wider for baritone, requiring greater embouchure control.
Popular Mouthpiece Brands
Several brands consistently stand out in the saxophone mouthpiece world, each offering unique characteristics and catering to different player preferences. Vandoren is renowned for its consistently high-quality hard rubber mouthpieces, favored by students and professionals alike, with extensive comparison charts available to aid selection.
Theo Wanne specializes in innovative designs, particularly metal mouthpieces, emphasizing enhanced projection and responsiveness. Yamaha provides reliable and affordable options, often recommended for beginners, like the 4C model, focusing on ease of play and consistent performance. Exploring these brands provides a solid foundation for finding your ideal mouthpiece.
Vandoren Mouthpieces
Vandoren is a highly respected name in saxophone accessories, particularly celebrated for its comprehensive range of mouthpieces. They offer options in both hard rubber and, to a lesser extent, metal, catering to diverse playing styles and saxophone types – soprano, alto, tenor, and baritone.
Vandoren’s mouthpieces are known for their consistent quality and focused tone. Their detailed comparison charts are invaluable resources for players seeking specific characteristics. Many educators recommend Vandoren for students due to their reliability and ease of play, making them a staple in saxophone education and performance worldwide.
Theo Wanne Mouthpieces
Theo Wanne mouthpieces represent a modern approach to saxophone design, blending vintage concepts with contemporary precision engineering. Wanne is particularly renowned for its focus on mouthpiece tip openings and their impact on playability, offering detailed charts comparing modern and vintage sizes for all saxophone types.
These mouthpieces are often favored by professional players seeking a powerful, resonant sound with enhanced projection and responsiveness. Wanne’s designs prioritize efficiency and tonal clarity, catering to a wide range of musical genres. They are considered a premium brand, known for innovation and meticulous craftsmanship.
Yamaha Mouthpieces
Yamaha mouthpieces are widely recognized as excellent choices, particularly for beginner and intermediate players, offering consistent quality and reliable performance; Yamaha recommends their 4C mouthpiece as a standard starting point, paired with a size 2 reed, to facilitate proper embouchure development and foundational technique.
These mouthpieces are designed for ease of play and a balanced tone, making them ideal for learning and building a solid playing foundation. While often considered a beginner option, Yamaha also produces higher-end mouthpieces for more advanced players seeking specific tonal characteristics. They represent a trusted brand known for durability and consistency.

Mouthpiece Comparison Charts & Ratings
Navigating the vast selection of saxophone mouthpieces can be daunting, making comparison charts invaluable tools for informed decision-making. Resources like Vandoren provide detailed indexes comparing mouthpieces across various brands and models, categorized by saxophone type – soprano, alto, tenor, and baritone.
These charts typically rate mouthpieces on a scale, offering a quick overview of their characteristics and suitability for different playing styles. Examining these ratings allows players to identify potential options based on desired tonal qualities, projection, and ease of play. Utilizing these resources streamlines the selection process, saving time and effort.
Beginner Mouthpiece Recommendations

For those embarking on their saxophone journey, selecting the right mouthpiece is paramount for establishing a solid foundation. Yamaha consistently recommends their 4C mouthpiece as an excellent starting point for beginners. Paired with a size 2 reed, the 4C facilitates ease of embouchure development and promotes consistent tone production.
This standard mouthpiece offers a balanced response, making it forgiving and accessible for new players. Focusing on long tones with a 4C and a 2 reed allows students to build proper technique and control before exploring more specialized options. It’s a reliable choice for initial learning and progress.
Intermediate/Advanced Mouthpiece Considerations

As players progress, mouthpiece selection becomes increasingly personalized, impacting tone color, projection, and responsiveness. Intermediate and advanced saxophonists often explore hard rubber and metal mouthpieces to refine their sound. Metal mouthpieces, known for power and projection, suit louder genres, while hard rubber offers adaptability.
Tip openings become a key consideration; larger openings demand greater embouchure control but unlock tonal complexity. Brands like Vandoren and Theo Wanne provide extensive options, with comparison charts aiding informed decisions. Experimentation is vital – swapping mouthpieces allows players to discover what best complements their style and instrument.
The Impact of Tip Opening on Playability
Saxophone mouthpiece tip opening significantly influences playability, demanding adjustments in embouchure and breath support. Smaller tip openings are generally easier for beginners, requiring less air and control. However, they limit dynamic range and tonal color. Larger openings offer greater expressive potential but necessitate a stronger embouchure and consistent airflow.
Theo Wanne’s charts detail tip sizes across brands, aiding comparison. Players transitioning to larger openings may experience initial resistance, requiring practice to maintain stability and intonation. Ultimately, the ideal tip opening aligns with playing style, saxophone type, and desired sonic characteristics.
Embouchure and Mouthpiece Compatibility
A harmonious relationship between embouchure and mouthpiece is fundamental to saxophone playing. The embouchure – the shaping of mouth and lips – must adapt to the mouthpiece’s characteristics. Beginners, as Yamaha suggests, should focus on correct embouchure with a standard mouthpiece (like the 4C) and a size 2 reed.
Different tip openings and baffle designs demand specific embouchure adjustments. A tighter embouchure is often needed for brighter, more focused sounds, while a more relaxed embouchure suits darker tones. Incompatibility leads to instability, poor tone, and difficulty controlling the instrument. Experimentation and mindful practice are key to finding the optimal pairing.
Diagnosing Mouthpiece Issues
Identifying mouthpiece problems is crucial for maintaining optimal saxophone performance. Common issues include air leaks, chipping, or facing irregularities. If experiencing difficulty controlling the instrument or achieving a consistent tone, the mouthpiece could be the culprit.
According to repair guides, diagnosing often involves careful inspection. Look for cracks, especially in hard rubber, and assess the facing for evenness. A damaged facing significantly impacts playability. If issues persist, consulting a qualified technician is recommended. Remember that mouthpiece problems can mimic embouchure issues, so careful evaluation is essential before making adjustments.
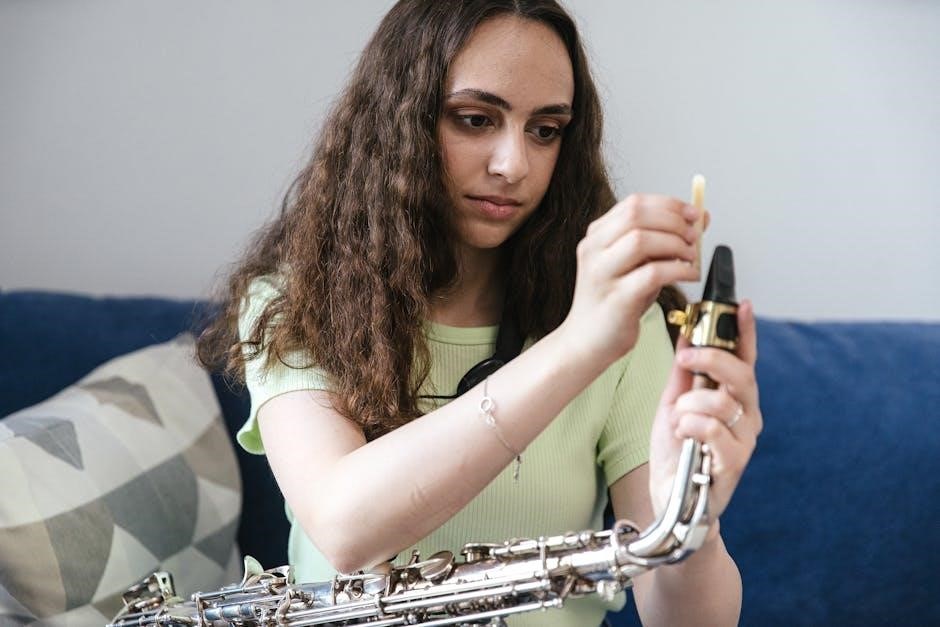
Mouthpiece Maintenance & Care
Proper mouthpiece care extends its lifespan and maintains optimal performance. Regular cleaning is paramount; after each playing session, gently wipe down the mouthpiece with a soft cloth to remove moisture and saliva. Avoid harsh chemicals or abrasive cleaners, as these can damage the material.
For hard rubber, occasional cork grease application on the tenon helps ensure a secure fit; Inspect regularly for cracks, particularly in hard rubber models. Store the mouthpiece in a dedicated case or pouch to protect it from damage and environmental factors. Consistent care prevents costly repairs and ensures a consistently enjoyable playing experience.
Mouthpiece Swapping & Experimentation
Exploring different mouthpieces is key to finding your ideal sound. Don’t hesitate to experiment! Swapping mouthpieces allows you to discover how varying tip openings, facings, and materials impact your tone, projection, and overall playability.
Start with a few well-regarded options within your budget. Keep detailed notes on each mouthpiece’s characteristics – how it feels, sounds, and responds. This systematic approach helps identify preferences. Remember, a mouthpiece that works wonders for one player might not suit another. Embrace the journey of discovery and refine your setup for personalized results.

Where to Buy Saxophone Mouthpieces
Numerous retailers offer saxophone mouthpieces, both online and in brick-and-mortar stores. Sweetwater is a prominent online destination, known for its extensive selection and expert advice. Local music stores provide the benefit of hands-on testing and personalized guidance from experienced staff.

Consider websites like Woodwind & Brasswind and Amazon for competitive pricing and variety. Directly purchasing from brand websites, such as Theo Wanne or Vandoren, ensures authenticity. Before committing, compare prices and shipping costs. Don’t overlook used marketplaces for potential deals, but exercise caution and inspect the mouthpiece thoroughly.
Resources for Further Research
Expanding your knowledge beyond this guide is highly recommended. The Yamaha Corporation website offers valuable insights into reed and mouthpiece selection for beginners, emphasizing embouchure development. Vandoren’s mouthpiece comparison charts (available as PDFs) provide a detailed overview of their product range across saxophone types.

Explore InSync’s Sweetwater guide for a comprehensive overview of mouthpiece materials and their sonic characteristics. Theo Wanne’s website features detailed tip opening charts, crucial for understanding playability. Online saxophone forums and communities offer a platform to connect with experienced players and gather diverse perspectives.